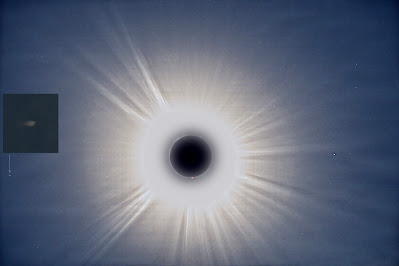
The creation of High Dynamic Range (HDR) images of the solar corona is a fascinating challenge, driven by the need to capture the vast dynamic range of brightness that defines these celestial phenomena. This endeavor marries the artistic with the scientific, uncovering details and structures of the corona that a single exposure could never reveal.
 |
| The Solar Eclipse of April 8, 2024: An HDR Revelation of the Sun's Corona from Westport, New York |
This particular HDR image of the solar corona was meticulously crafted from a series of exposures captured during the total solar eclipse on April 8, 2024. My setup for totality included a Canon Ra camera, a Canon EF200mm f/2.8L II USM Lens paired with a Canon 2x III Extender for an effective focal length of 400mm, set at F/8, ISO 200. The camera was mounted on an iOptron SkyTracker, and I utilized a laptop with the SET'n'C (Solar Eclipse Timer and Controller) for precise camera control. The range of exposure times spanned from 1/1000 to 4 seconds, encompassing 1/1000, 1/500, 1/250, 1/125, 1/60, 1/30, 1/15, 1/8, 1/4, 1/2, 1, 2, and 4 seconds.
During the eclipse, I successfully captured four complete series of photos at these shutter speeds, all in CR3 format. I then processed these files in a Raw editor, adjusting texture, clarity, and denoise settings before saving them as 16-bit TIFF files.
In Photoshop, I centered the photo by loading the images into layers (File > Scripts > Load Files into Stack...) and utilized the “difference” blending mode for layers, manually centering each image using the arrow keys. An average shift calculation from image to image helped address the challenge of centering overexposed images, which could not be simply aligned based on the moon alone.
To create a mean image, I converted the selected layers into a Smart Object and applied the Mean stack mode (Layer > Smart Objects > Stack Mode > Mean), then flattened the image and saved it as mean.tif. For the moon to be at the center of the image, I cropped it accordingly.
I applied a Radial Blur in Photoshop (Filter > Blur > Radial Blur) with the settings: Spin as the Blur Method, Best for Quality, and an Amount of 10, ensuring the moon was centered in the image. This blurred image was saved as blur.tif.
To subtract the blurred image from the original, I used the Apply Image command (Image > Apply Image), setting the source to blur.tif, with the blending mode set to Subtract and an offset of 128. I then compressed the dynamic range using the Levels tool (Image > Adjustments > Levels) and saved the file as subtract.tif.
 |
| Clarity Unveiled: High Pass Filtering by Subtracting Radial Blur from the Original |
To multiply the mean image with the subtracted image, I once again used the Apply Image command, setting the blending mode to Multiply. The final image was saved as done.tif.
Final touches were made using Topaz Denoise, the Raw Filter editor, and other Photoshop tools to enhance the image.
 |
| Totality HRD Image v.2 |
The final HDR composition is not merely a visual feast but a technical triumph that reveals the complexity and elegance of the sun's atmosphere. These images are invaluable, providing insights into solar physics and the forces that shape the corona. They also offer a breathtaking visual experience that conveys the awe-inspiring beauty of solar eclipses to a global audience. Through this HDR image, the profound beauty of a transient celestial moment is captured, enriching our appreciation and understanding of the cosmos's wonders and presenting the solar corona in a captivating new light.


